Happy Halloween 2016! What a perfect reason for me to bake and decorate cookies! :D
Take a break from Pokemon hunt, made some really sweet and tasty treats for the kids on the once a year Trick Or Treat at our condominium. Aren't they cute?
Take a closer look....

....and some spooky marshmallows...

Alright, I know what's the next question: How to shape the Pokemon cookies?
Well, this is pretty easy. All you need is the cookie cutter that is available at my online shop. You can pm me via Miki's Food Archives blog page for details.
 |
| Ready stock. |
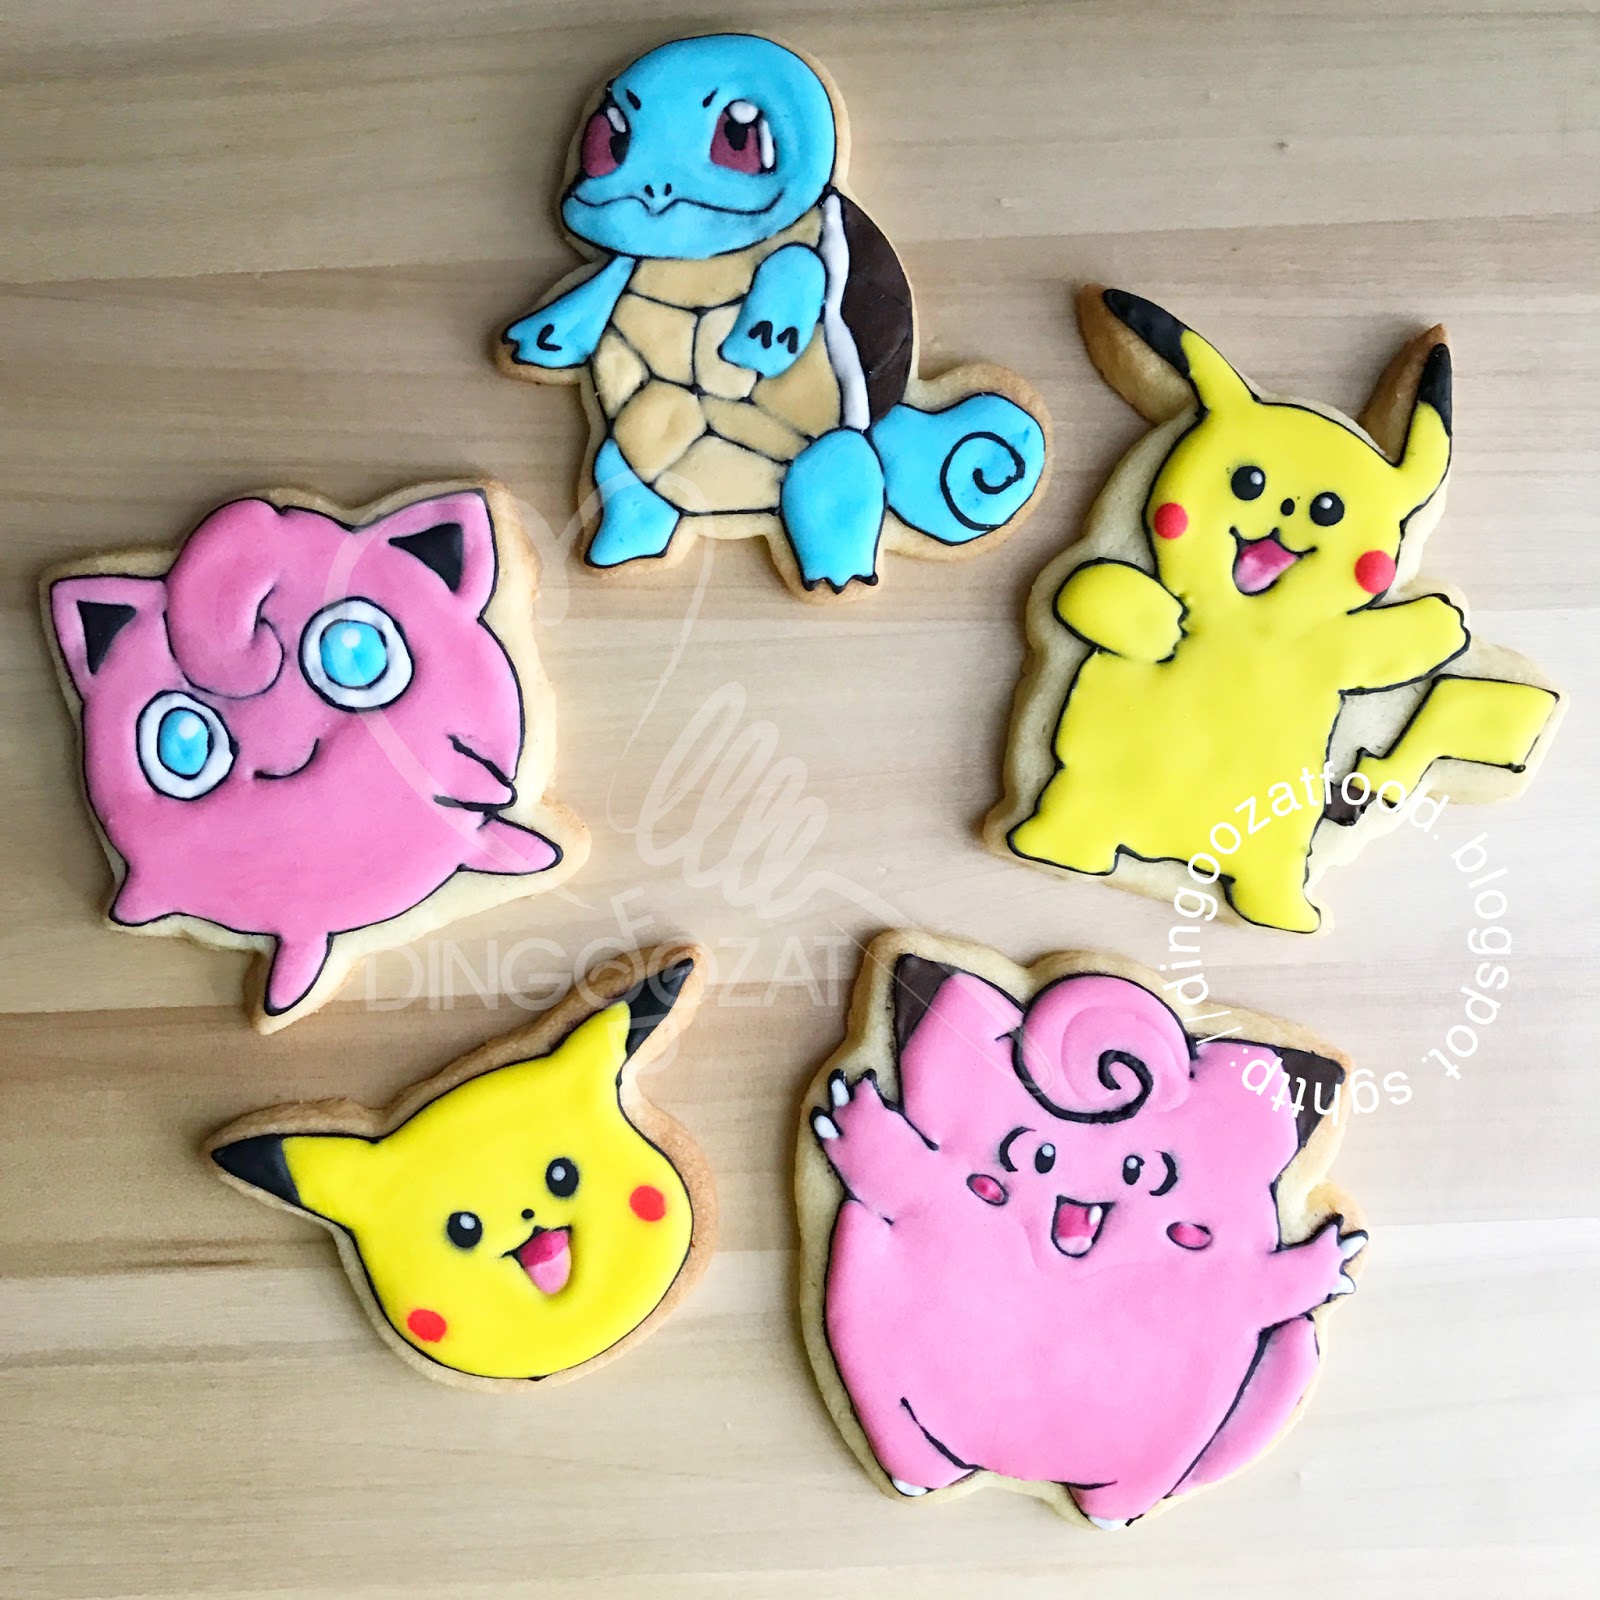 |
| Pokemon cookies, made using these good quality stainless steel cutters. |
These are sugar cookies made with my secret recipe. Yes, this recipe will remain 'secret' because the dough is very hard to handle, not pliable and really needs some skill to work with it. Therefore, I would rather keep it than sharing it to avoid any disappointment. However, I would recommend another recipe that works well with royal icing. Although it's not as tasty as sugar cookies, but it is a lot more user friendly, it is easy to shape.
This is the recipe that I previously used to make squirrel cookies and bear cookies.
Ingredients: 材料
80g Unsalted Butter (softened) 无盐牛油 80克,软化
60g Icing Sugar 糖粉 60克
25g Egg (lightly beaten) 鸡蛋 25克 ,打散
1/4 tsp Vanilla Extract 香草精 1/4 小匙
150g Cake Flour 低粉 150克
If you are sharing this recipe, kindly attach the link to this blog instead of screen capture/ copy & paste/ use in your blog and claimed as your recipe! Thank you.
如果您要分享此食谱,请联系这个部落格的相关链接。敬请不要复制或改篇为自己的食谱。谢谢!
Method: 步骤
把牛油和糖粉打至松发。
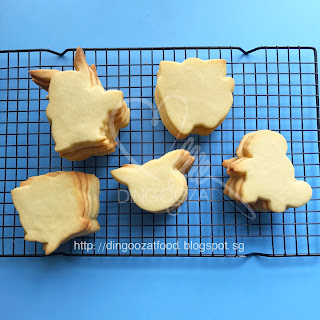
1. Remove cookies from the oven, let it rest on the baking tray for 5 minutes. Transfer the cookies onto a cooling rack, let it cool completely.
2. Gradually beat in egg and vanilla extract.
分次加入鸡蛋和香草精。
3. Add in flour and mix with low speed.Use a spatula to scrape the sides and bottom. Form a dough.
慢慢加入低粉,搅拌均匀成面团。
4. Cover the dough with cling wrap, roll out the dough to about 1cm thick and refrigerate for at least 1 hour.
用保鲜纸把面团盖好,擀平大概1cm厚,放进冰箱冷藏1小时。

1. When you are ready to bake, remove the dough from the refrigerator. Let it soften until the dough is pliable to roll.


To assemble and bake:
把面团放置室温,少许软化即可造型。
2. Flour your rolling pin and rolling surface. Roll out the dough to about 0.5cm thick, use a cookie cutter to cut out the dough. Carefully place the cut out cookie on a lined baking tray. Repeat for the rest. (You can purchase the Pokemon cookie cutters here. )
把面团擀平至0.5cm厚, 用饼模切出精灵宝可梦造型,放在已铺好油纸的烤盘上。(饼模可以到我的专页购买:点击这里)
3. Bake in a preheated oven 180’C for about 15 minutes or until they are set and barely browned around the edges.
放进已预热的烤箱,以180度烘烤15分钟。
To decorate:
烘烤完成后从烤箱取出饼干,饼干在烤盘上5分钟后才把饼干放在架子上待凉。
2. When cookies are completely cool, ice and decorate as desired.
饼干完全室温后即可装饰。若喜欢我的食谱,可以LIKE和追随我的面书专页,不要错过最新食谱发布。
If you like my recipe, click here, LIKE & FOLLOW my facebook page to receive more recipe updates. Don't forget to change the setting to 'SEE FIRST' if you wish to see my post on your Facebook news feed. Enjoy!
If you like my recipe, click here, LIKE & FOLLOW my facebook page to receive more recipe updates. Don't forget to change the setting to 'SEE FIRST' if you wish to see my post on your Facebook news feed. Enjoy!